

If there is one thing I have learned as a mother of two, it is that the stretch between 2:00 PM and 4:00 PM is the hardest part of the day.
By mid-afternoon, the house usually feels a little too small, the kids are restless, and the Cambodian afternoon heat means running wildly in the direct sun isn’t a great option.
We needed a change of scenery, but I didn’t have the energy to build a complicated, Pinterest-perfect indoor fort that would take up my entire living room.
So we took it outside.
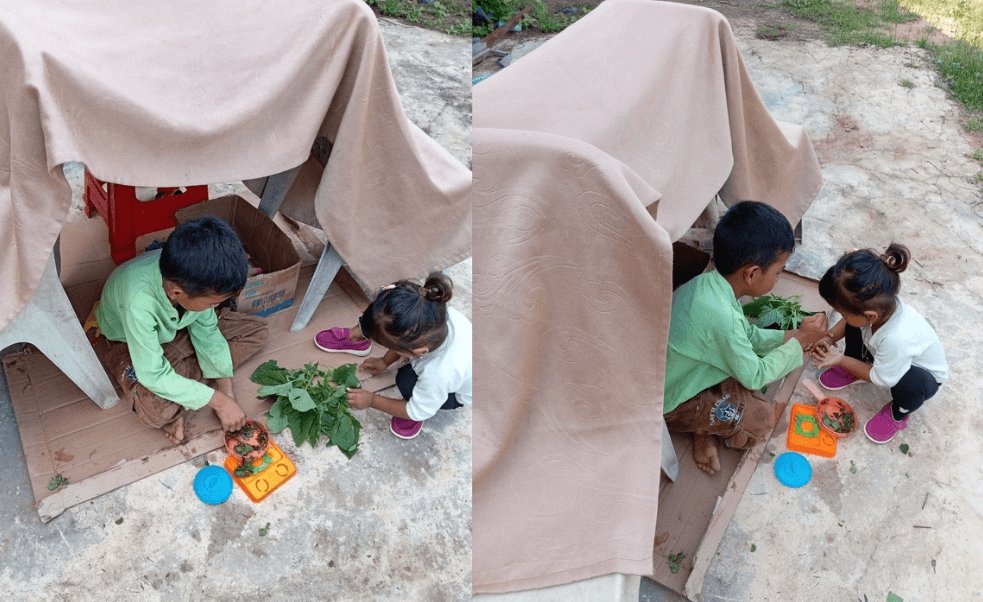
Using just four things I already had lying around the house, I put together a shaded hideout in exactly two minutes. It turned the whole mood of the afternoon around, gave my 8-year-old and 3-year-old a shared space to play together, and cost absolutely nothing.
It has since become one of our go-to backyard activities for a hot afternoon whenever we need to get outside without melting in the sun.
What Can You Use Instead of a Play Tent?
You do not need to buy a special pop-up play tent to pull this off. Kids are thrilled by the simple magic of being “hidden” under everyday furniture, so this works as an easy, free stand-in for anything store-bought.
Here is exactly what we used:
- 1 sturdy outdoor plastic table: This acts as the main frame and roof.
- 1 large, heavy blanket: We used a thick tan blanket to block out the sun and create a shaded little cave underneath.
- 1 small plastic stool: Our little red one was the secret weapon for this build.
- 1 large flattened cardboard box: To act as the floor.
How to Build an Outdoor Table Tent
Whenever I try to build forts indoors with couch cushions, they collapse after five minutes, and it usually ends in tears. This outdoor table method holds its shape the whole time.
1. Lay down the floor
Our patio is hard concrete, which isn’t exactly comfortable for little knees and can get pretty dusty. I grabbed a flattened cardboard delivery box and slid it right under the table.
It works as a clean play mat that keeps their clothes from getting completely ruined.
2. Prop up the ceiling
Before draping the blanket, I placed a small red plastic stool on top of the table. I actually added the stool after the blanket initially sagged in the middle, and my 8-year-old quickly ran inside to grab it for me.
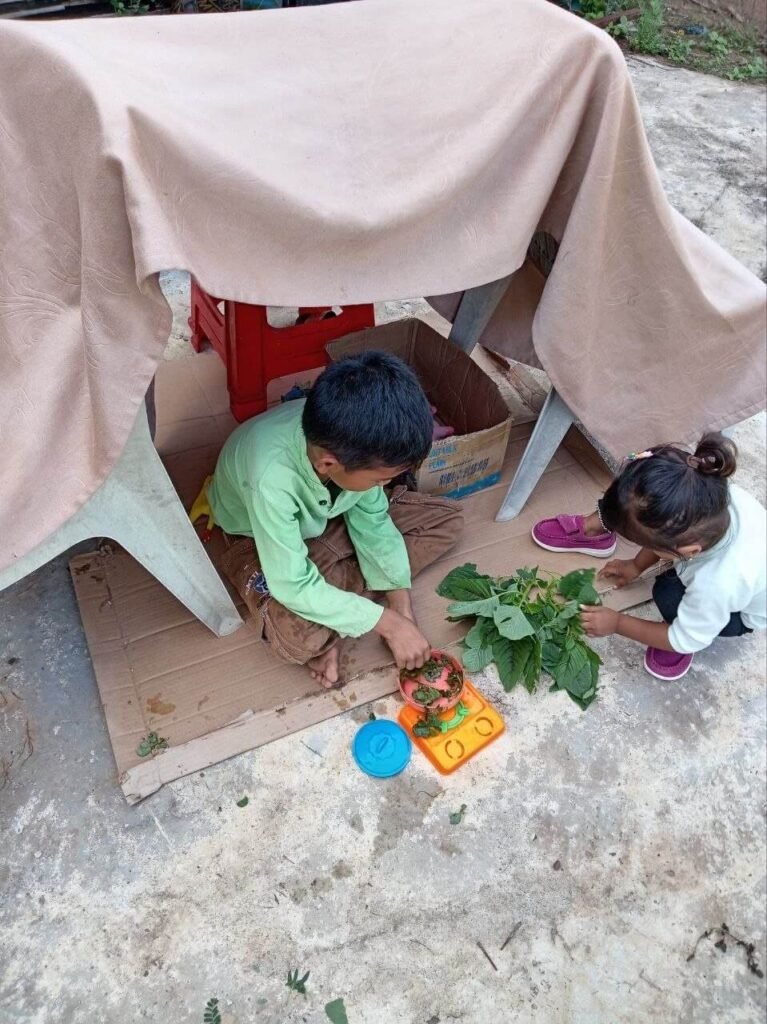
This one trick makes a real difference. It props the blanket up like a tent pole, giving the kids extra headroom so the fabric isn’t hanging in their faces.
3. Drape the blanket
Finally, we threw the heavy tan blanket over the top of the table and the stool. It instantly created a cool, shaded hideout, and within seconds the kids were already climbing in.
I left the front completely open to ensure plenty of cool airflow, and since I was sitting right there with them, it was a perfectly safe, supervised setup.
An Easy Outdoor Play Idea for Siblings With a Big Age Gap
Once the tent was built, the kids immediately took ownership of it. They didn’t bring out any of their expensive indoor toys. Instead, they grabbed one small plastic toy stove, a little pink pot, and a big handful of green leaves from the garden.
It quickly turned into their own version of a toddler mud kitchen, with leaves standing in for every ingredient.
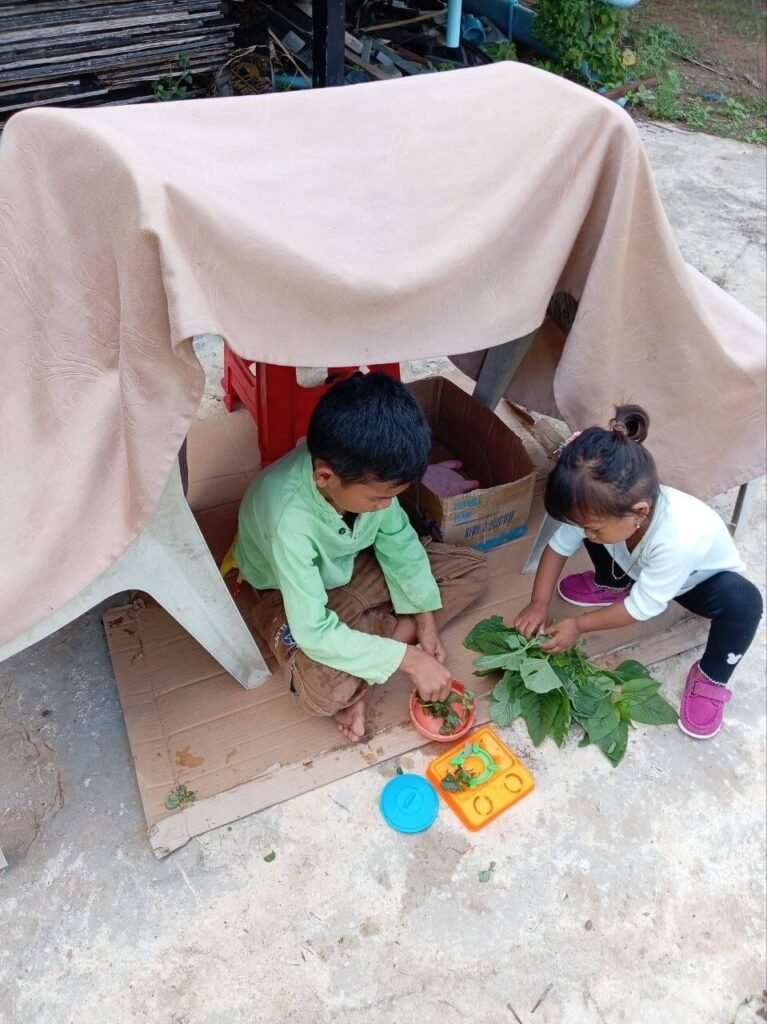
Finding activities that work for both an 8-year-old and a 3-year-old at the same time can be tricky, but under that table, they became a team.
My son took on the role of head chef. He sat cross-legged on the cardboard, carefully pulling the green leaves off their stems.
My toddler daughter was his eager helper, picking up the leaves, handing them over, and stuffing them into the tiny pink pot.
The smell of crushed green leaves filled the little space, and for nearly an hour I just got to sit back and listen to them decide what kind of soup they were cooking. They even proudly served me a bowl of their signature “green leaf and dirt stew,” warning me to blow on it first because it was very hot.
Pairing one simple plastic toy with real leaves from the yard sparked far more imagination than I expected from something this basic.
Easy Cleanup for a Mess-Free Outdoor Activity
As much as I love setting up activities for the kids, I dread the cleanup afterward. That is the best part of this hack.
Once they were ready to head back inside, putting the whole thing away took less than a minute. I folded the blanket, tossed the cardboard box into the recycling pile, and swept the leftover leaves off the concrete.
No tiny plastic pieces to step on. No glue to scrub off the table. Just a table and a blanket, folded up and back to normal in seconds.
A Backyard Setup Worth Repeating
If you are facing a long afternoon and the kids are bouncing off the walls, you do not need a shopping trip or a complicated setup to keep them busy.
Drag a table outside, throw a blanket over it, and let this simple DIY setup do the rest. It has become one of the simplest, cheapest ways I know to turn a tough afternoon into a good one.
Disclaimer: The ideas and routines shared on TheParentings reflect my personal experiences as a mother and primary school teacher. This content is for informational purposes only and is not a substitute for professional medical, developmental, or psychological advice. Always consult your pediatrician with specific concerns regarding your child’s health or safety.
